
Hello everybody!
I'm back to share with you some new inspirations.
I'm back to share with you some new inspirations.
This month, two layouts of '' In The Mood '' and one of ''Chesterville'' ...
========================
My first one is :
*Lifetime Dream*
( In The Mood, Pensive )

========================
My first one is :
*Lifetime Dream*
( In The Mood, Pensive )


For those who know me, know that I like to create or modified flowers.
I have almost the same tools as the florist...
For this layout I had fun with the Moody Florals.
The first on the top is simply heated with heat gun, as is, then I added a bling as a center.
The others are only one layer of petal folded on itself.

The butterflies are embossed with Pixie Dust. The cercle ring embossed with Ivory, then I added a bit of pink pearl ink to contrast. The first layer of chipboard flowers is embossed with a mixt of Baby Pik and Pixie Dust, and the other one embossed in snow and over heated with heat gun and ink too.

On my heart Gold Nugget seedlings.
n the center of Attic Charm Daisies flower, mix of two shades of pink: Tickled, Pink Glass and Gold Nugget too. Under the flower a piece of Lace 12, ripped.

'' Dreamy '' is the title of one paper of the In the Mood Collection, I cut the word
on the paper and I scratched it.
'' Simply because ... '' comes from the printed chipboard sheet. I used another piece at the top of my page, ''In The Mood ''

Butterflies in Pink Dust embossing powder and my Title ...
I did a test, not very conclusive, still pretty but not perfect ... I mixed two embossing powders, added to my chipboard with versamark and I heat it ...
I have almost the same tools as the florist...
For this layout I had fun with the Moody Florals.
The first on the top is simply heated with heat gun, as is, then I added a bling as a center.
The others are only one layer of petal folded on itself.

The butterflies are embossed with Pixie Dust. The cercle ring embossed with Ivory, then I added a bit of pink pearl ink to contrast. The first layer of chipboard flowers is embossed with a mixt of Baby Pik and Pixie Dust, and the other one embossed in snow and over heated with heat gun and ink too.

n the center of Attic Charm Daisies flower, mix of two shades of pink: Tickled, Pink Glass and Gold Nugget too. Under the flower a piece of Lace 12, ripped.

on the paper and I scratched it.
'' Simply because ... '' comes from the printed chipboard sheet. I used another piece at the top of my page, ''In The Mood ''

Butterflies in Pink Dust embossing powder and my Title ...
I did a test, not very conclusive, still pretty but not perfect ... I mixed two embossing powders, added to my chipboard with versamark and I heat it ...
************************************
Blue Fern Studios pruducts used:
Paper:
Pensive
Chipboards:
Printed In The Mood
Pensive
Chipboards:
Printed In The Mood
Embossing Powder:
Pixie Dust
Ivory
Snow
Glitters:
Rose Gold
Flowers:
Attic Charm Daisies
Moody Floral
Late Winter Lilies ( Pink )
Harvest Lilies ( yellow )
Stamps:
Tattered Newsprint
Seedlings:
Tickled
Pink Glass
Glass
Gold Nugget
Laces:
Lace 4
Lace 12
************************************
My next one:
*Beautiful*
( In The Mood, Peaceful )

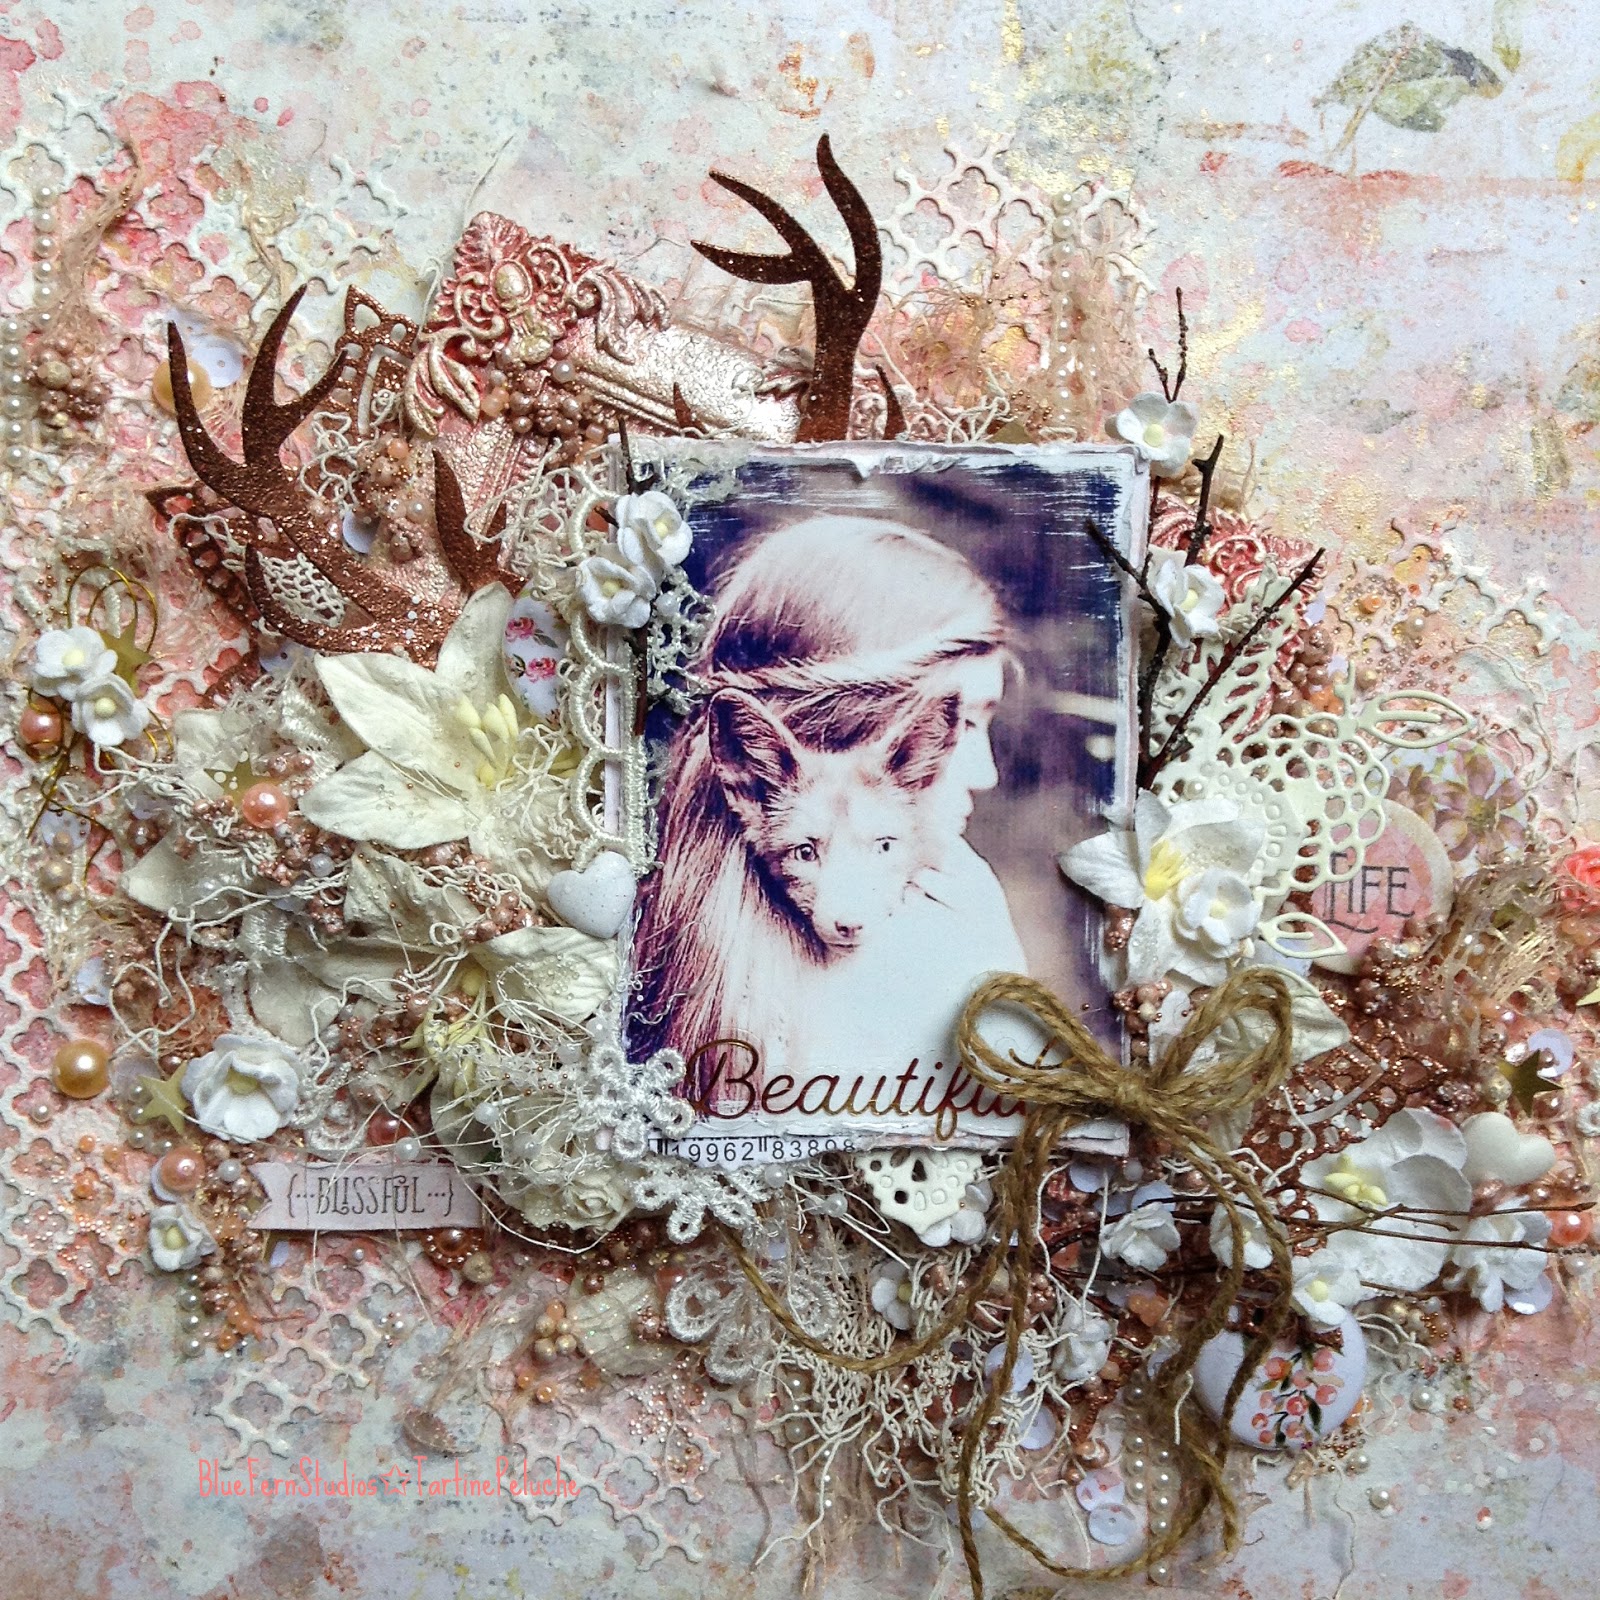
This paper it's really my favorite of the collection In The Mood,
I wanted to work it very romantic and especially in soft color.
So I choose to bring out the peach of the paper.

For that, I used some die cut embossed with the embossing powder Copper. This color perfectly match with peach shades of the paper.
I could have used the flowers from the Chesterville Blooms collection, they were perfect but did not match the sweet ambiance I wanted to give. So I used the Late Winter Lilies in white.
I put Glass seedlings in my flowers, much like a flowing river
they follow a path to the bottom of my layout.

The Life round chipboard come from Garden Life Printed Chipboard, under this one another round chipboard Remnants Chipboard Printed.

With this last one picture, we can see all the shine of the embossing powder Copper and some pieces of Lace 12, that I ripped and placed under my flowers.
*************************************
Blue Fern Studios products used:
Paper:
Peaceful
Chipboards:
Garden life printed chipboards
Remnants printed chipboards
Embossing Powder:
Copper
Ivory
Flowers:
Late Winter Lilies ( White )
Stamps:
Tattered Newsprint
Seedlings:
Glass
Twig
Laces:
Lace 12
************************************
And finally the last one:
*Love This*
( Chesterville, Holmes )

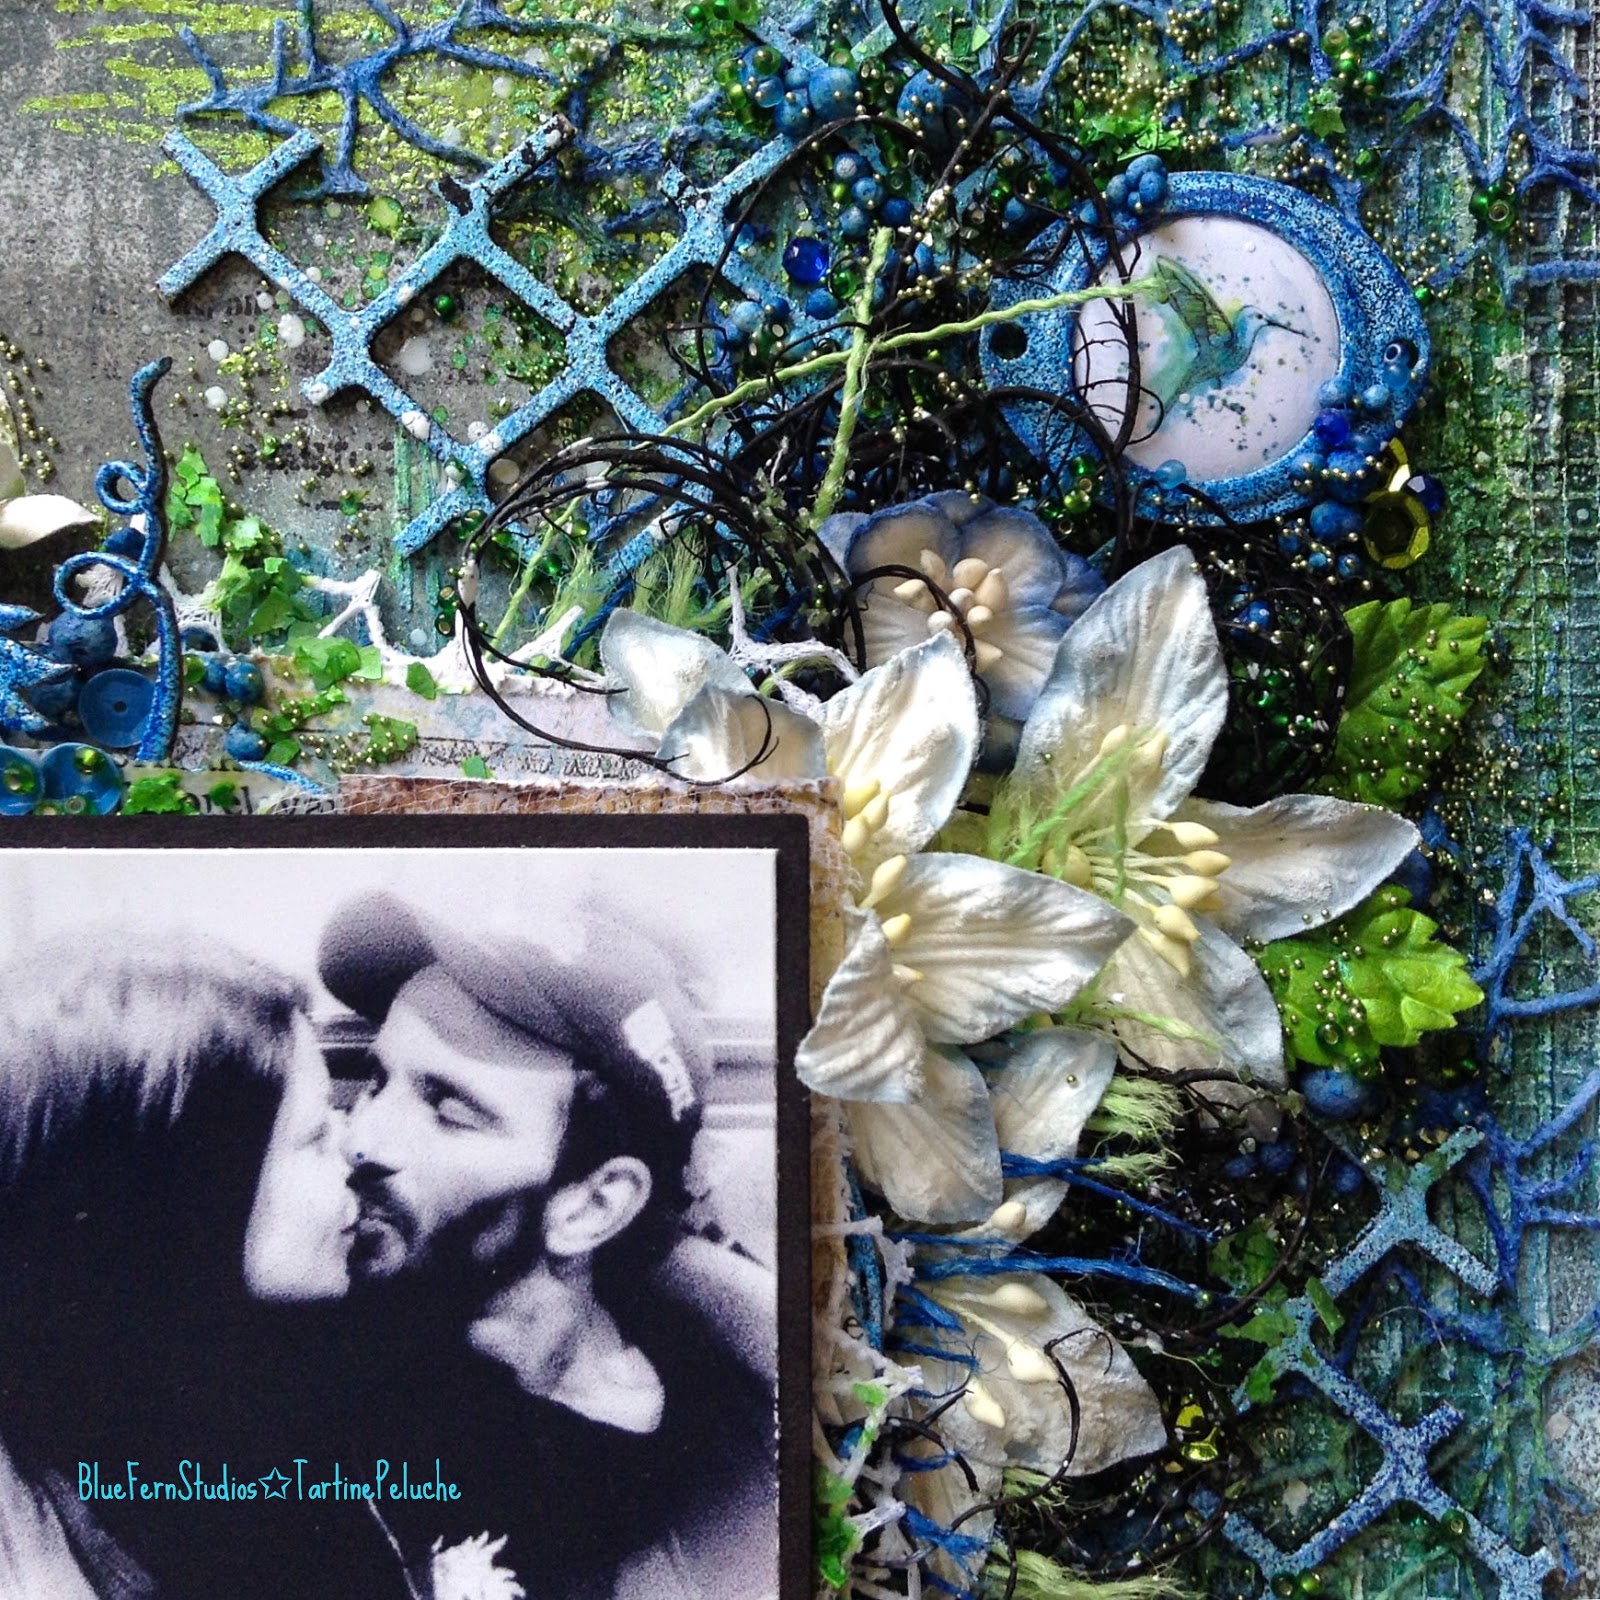
Zoom on the Wanderlust Lilies Flowers

The flower chipboard is embossed with Starry Night.
The chipboard Panel is embossed with Summer Breeze.

I used lot of seedlings on this layout. I mixed two shades of green. Fir Tree and Green Leaf.

*************************************
Blue Fern Studios products used:
Paper:
Holmes
Embossing Powder:
Starry Night
Summer Breeze
Flowers:
Wanderlust Lilies
Stamps:
Tattered Newsprint
Seedlings:
Fir Tree
Green Leaf
**************************************
Thanks for stopping by !
I hope I've inspired you.
I'll see you next month with another inspirations...
Hugs, Tartine xoxo


